To find where mice are getting in, record where you see signs indoors, then inspect the outside of the house for small openings. Check the foundation, doors, utility penetrations and vents before looking higher at soffits and roof edges. Compare those openings with the activity you recorded inside.
Mice can squeeze through an opening about ¼ inch (6 mm) wide, so an entrance may be easy to overlook. But finding droppings near a hole does not prove that hole is the exterior entrance. It might be a passage between rooms or a wall cavity. [1]
The aim is to build a short list of likely routes and identify the next inspection or repair each one needs.
For the broader prevention checklist, see how to mouse proof a house.
Gather a few simple inspection tools
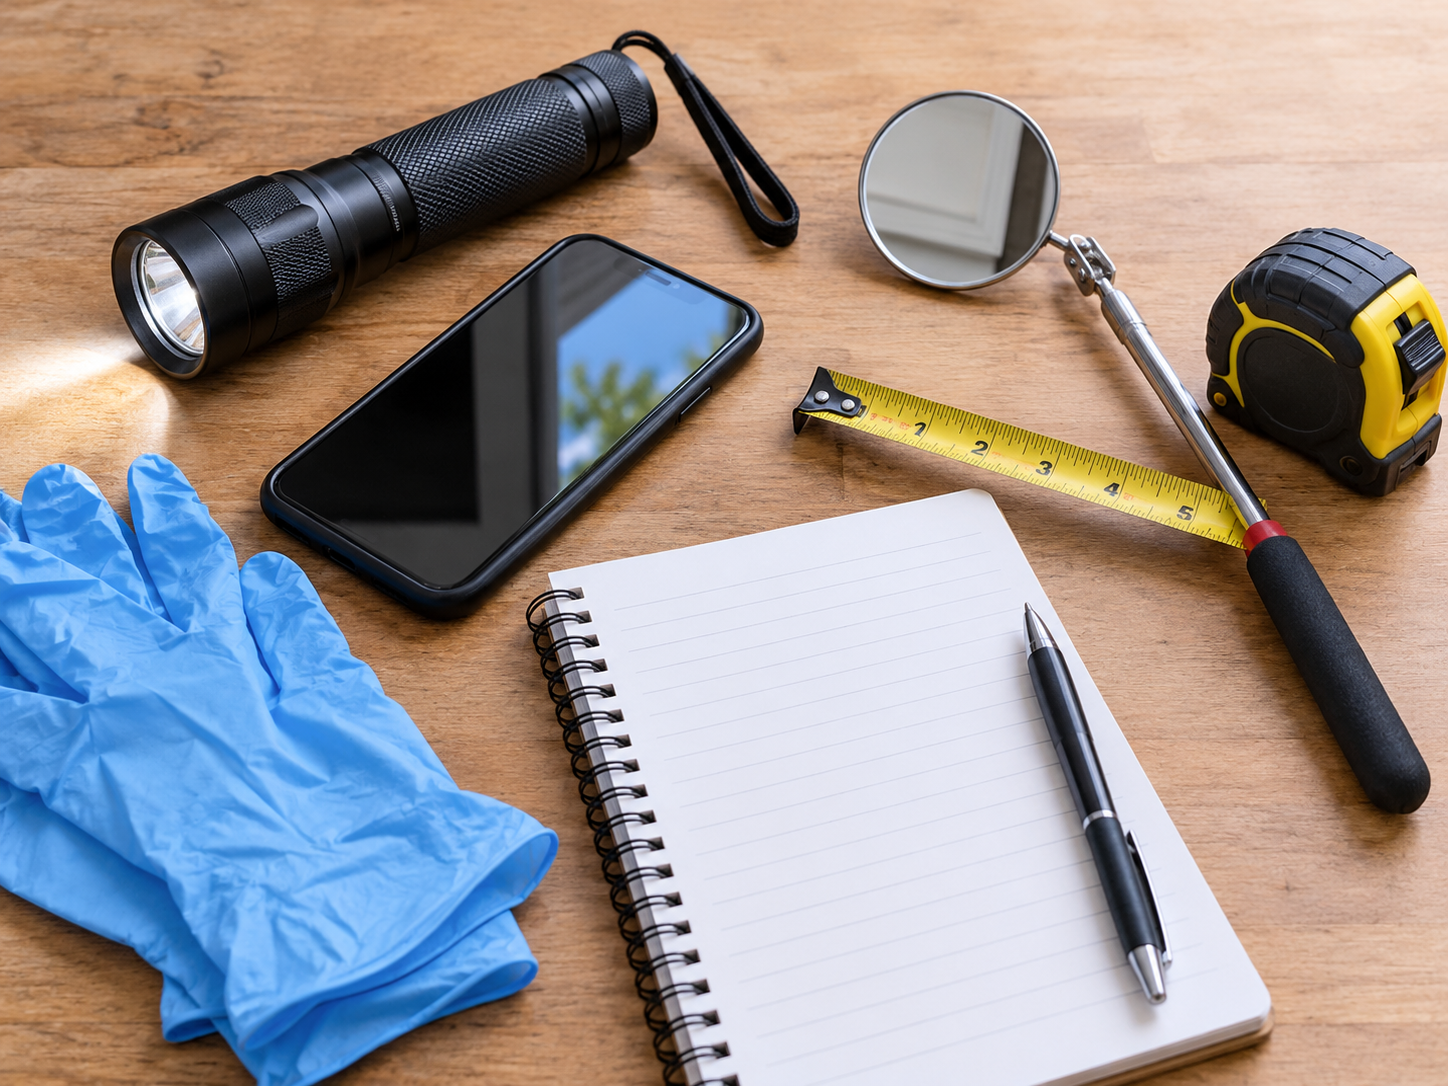
A flashlight, phone camera, small inspection mirror and ruler or tape measure are enough to start. Use the mirror to see around accessible corners without reaching blindly behind pipes or equipment. Photograph each suspected opening with a wider view as well as a close-up, so you can find it again.
Keep a simple log with four columns: location, opening, signs nearby and next action. For example: “East wall, gap around water pipe, no visible activity, compare with basement.” Record an estimate when a gap is awkward to measure; do not insert tools into electrical equipment, drains or utility fittings.
Before moving stored items, look for contamination. If you find rodent urine, droppings or nesting material, do not sweep or vacuum it. Follow the CDC’s disinfect-and-wipe cleanup procedure, including gloves and the disinfectant’s required contact time. Heavy contamination needs additional precautions. [2]
Step 1: Map the signs indoors
Begin where you first noticed the problem. Look in nearby cabinets, drawers and storage areas, then inspect safely accessible edges behind or beside appliances. Under sinks, around pipes and along floor-to-wall joints also deserve attention. [1]
Record droppings, gnawed food packaging, shredded nesting material and tracks if you can see them. These clues help identify activity areas. UC Integrated Pest Management notes that mice are mostly active at night, although they can also be seen during the day. [3]
Be careful about deciding how recent a sign is. Old gnaw marks can remain long after the damage occurred, and droppings are not a reliable clock. After safe cleanup, new droppings indicate continuing rodent activity. They still do not identify the exact outside entrance. [4]
Suppose you find droppings under the kitchen sink and a gap around the drainpipe. Record both. Then look for accessible openings along the pipe’s route and on the exterior wall nearby. A pipe gap in the back of a cabinet may connect to a concealed space, rather than directly outdoors.
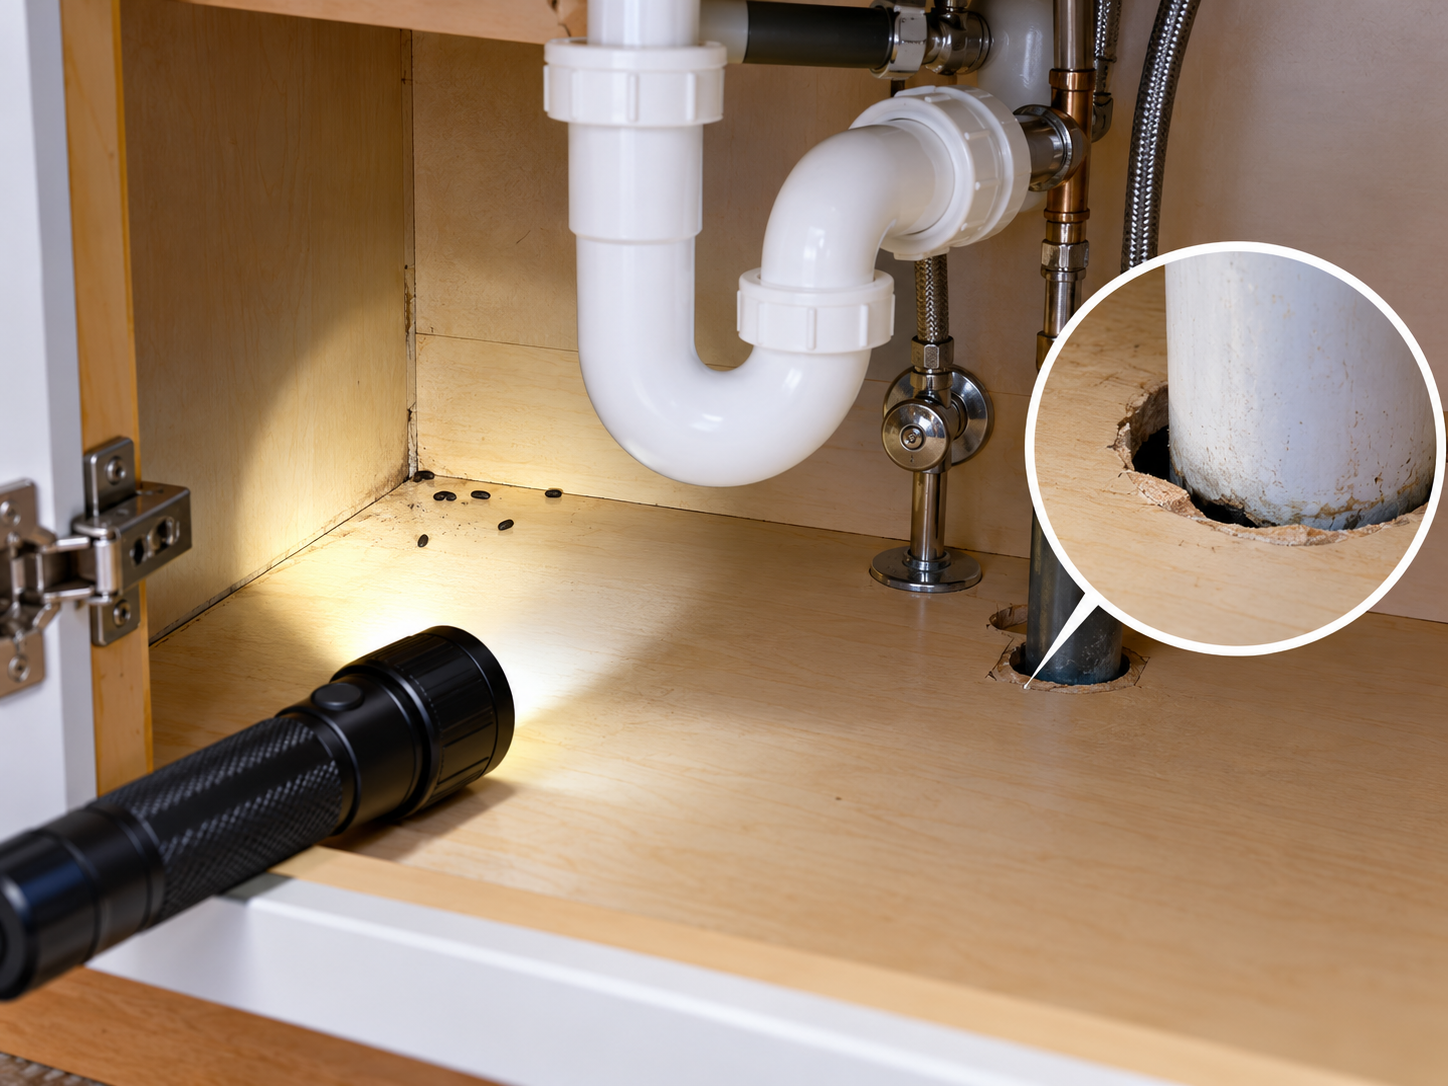
Do not pull apart cabinets, disconnect an appliance or open a wall just to follow a suspected route. Mark where the trail becomes inaccessible.
Step 2: Inspect the exterior from ground level upward
Choose a starting corner and work around the entire house in one direction. This keeps you from repeatedly checking one area while missing another. Inspect edges from more than one angle; a gap concealed by trim may be visible from the side.
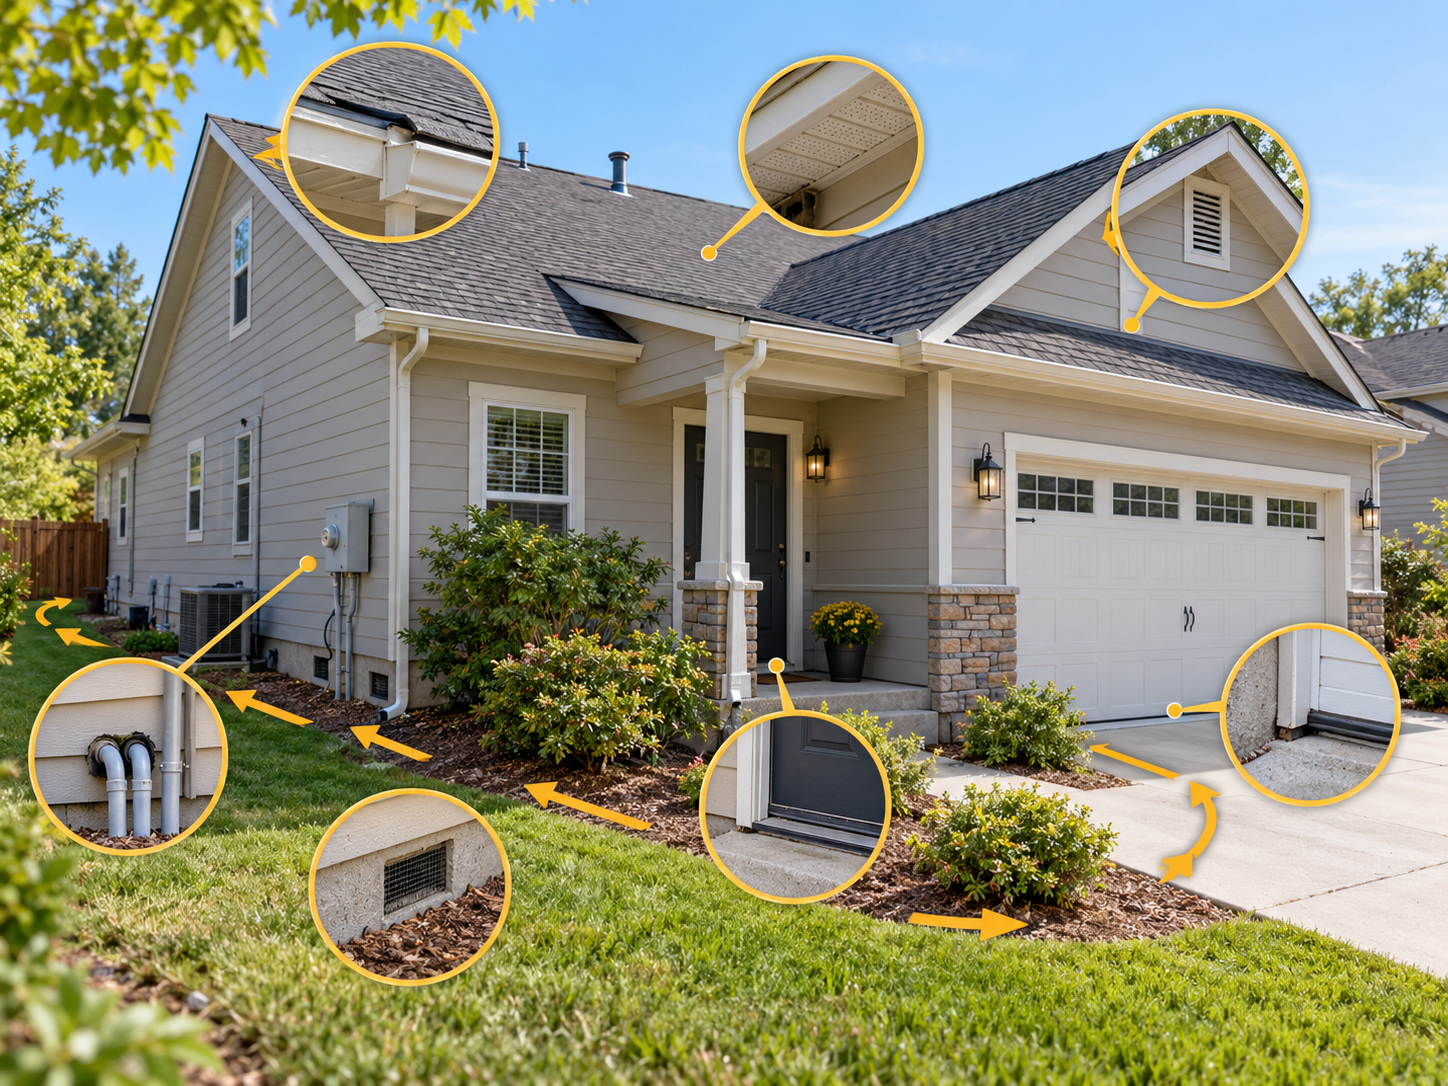
Use this table to organize the walk. The National Park Service’s exclusion manual identifies these building components as inspection areas; the recording steps are a practical way to apply that guidance. [7]
| Location | What to inspect | What to record |
|---|---|---|
| Foundation and lower wall | Cracks, damaged sections and gaps where building materials meet | Position, approximate width and whether the opening appears to continue inward |
| Utility penetrations | The perimeter around plumbing, cables, gas lines and AC lines | Missing or damaged seals; corresponding indoor location if accessible |
| Exterior doors | Bottom edge, threshold and side seals with the door closed | Visible gaps and worn or displaced sealing material |
| Garage doors | Bottom edge, sides and lower corners | Gaps remaining when the door is fully closed |
| Crawl-space and attic vents | Edges, covers and existing screening | Missing, loose or damaged protection |
| Soffits and roof edges | Accessible views of damaged trim and openings | A photo and location for further inspection from safe access |
Check doors in their closed position
A seal can look intact while the door is open and still leave a gap when it closes. Pay attention to the garage door’s bottom corners as well as its center. Record daylight you can see through the edges, but measure or inspect the opening before concluding a mouse can use it.
Inspect around utility lines without disturbing them
Look around the wall penetration, not inside the equipment. A failed seal is worth recording, but you do not need to move a gas line, remove an electrical cover or disconnect an AC line to investigate it. A qualified tradesperson should handle work that requires disturbing those systems.
For repair guidance after inspection, see how to seal gaps around pipes to keep mice out.
Look higher as well as at the foundation
Do not assume the entrance must be at ground level. House mice are capable climbers. Check roofline openings from the ground where you can, and use photographs to flag areas requiring safer access. [3]
An opening around a vent can be a concern, but the vent itself may be necessary. Do not plug vents to test a theory. Vent repairs need to preserve their function; dryer exhaust terminals must not be covered with mesh screens. If wildlife is already occupying an attic or vent, get appropriate removal advice before closing it. [5]
Step 3: Compare the indoor and outdoor findings
Put your photographs and notes side by side. Ask:
- Is there an outside opening near the indoor activity area?
- Is there a plausible connection through a basement, garage, crawl space or wall cavity?
- Are there fresh signs nearby, or only old damage?
- What part of the route cannot be inspected safely?
Treat these as questions, not a requirement to prove a complete route before making a suitable repair. An unprotected opening can need attention even when you have not watched a mouse use it.
| Finding | What it tells you | What it does not establish |
|---|---|---|
| An accessible gap | A potential passage worth evaluating | That mice currently use it |
| New droppings after safe cleanup | Rodent activity continues in that area | The exact entrance from outside |
| Gnaw marks or nesting material | Rodents have used or damaged the area | When it happened or the full travel route |
| A mouse seen passing through a gap | That animal used the opening at that moment | That it is the only route into the house |
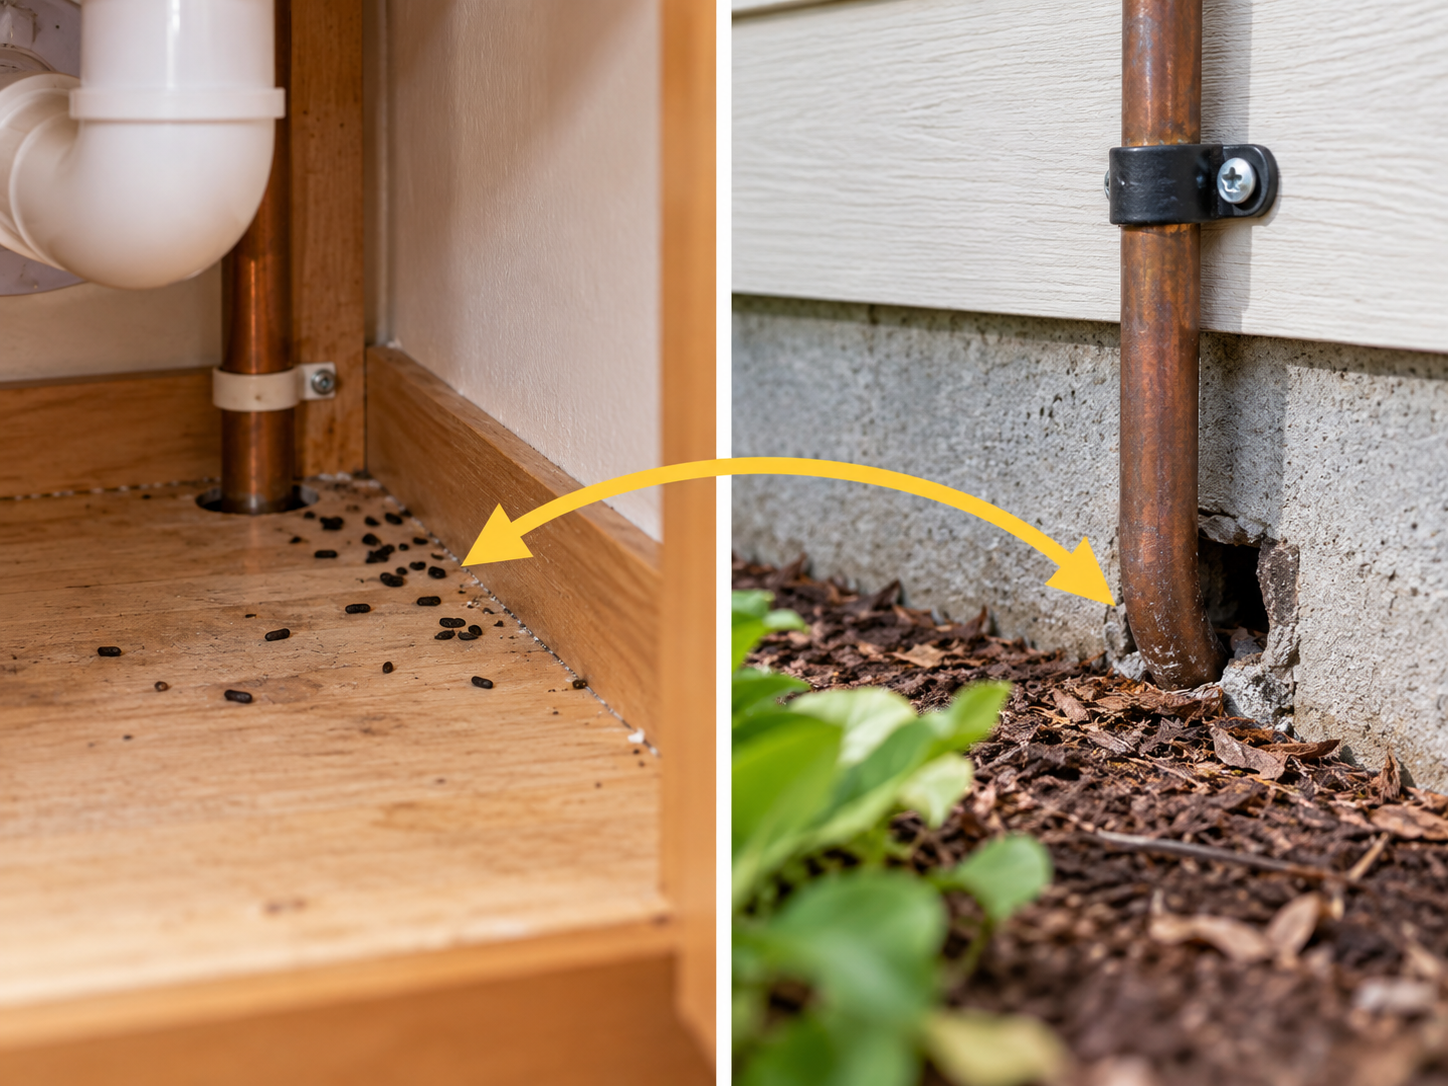
This distinction matters when signs appear several rooms away from an exterior opening. You may find part of the route without finding every connection.
Step 4: If the entrance is still unclear
Revisit the areas you could not see well on the first pass. A mirror may improve the view of an accessible pipe penetration or door corner. Photos can help you compare a suspect gap with the location on the other side of the wall.
If you already have a camera suitable for monitoring the area, you can aim it at a suspected route without disturbing contaminated material. Footage may show use of that opening; an empty recording does not rule it out. A camera is optional, and it should not delay repairs or control of an active infestation.
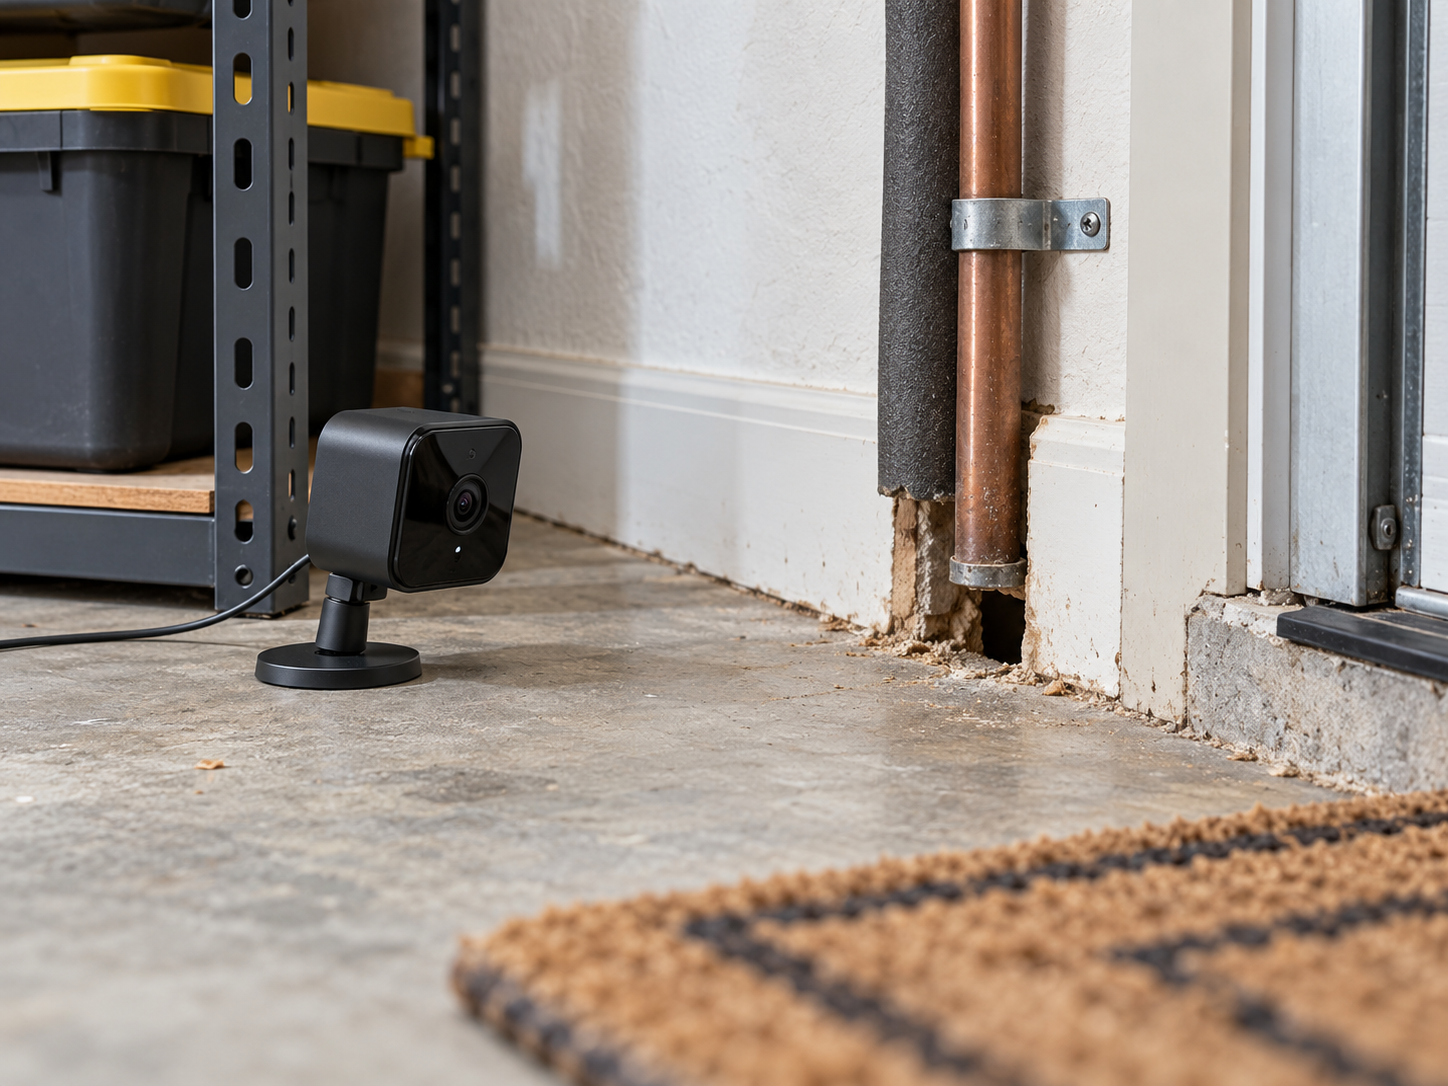
Avoid making a new mess to track movement. This guide does not recommend spreading flour, powders or pesticide dust around the house, or using smoke near concealed spaces and utilities. Notes, safe visual inspection and checks for new activity provide a simpler starting point.
Call a rodent-control professional when the route disappears into inaccessible spaces, activity continues despite your efforts, or contamination prevents safe inspection. Rodents in heating or cooling ducts also warrant professional help. [1, 2]
Step 5: Move from inspection to repair and control
Your log should now show which openings need a suitable repair and which require further inspection. Choose a repair based on the gap and the building component; do not treat every opening as a hole to fill with the same material.
If mice are already indoors, exclusion needs to be accompanied by control of the animals that remain. The CDC recommends snap traps placed where there is activity, following the trap instructions, keeping them away from children and pets, and checking them daily. [6]
After repairs and safe cleanup, revisit your recorded activity areas. Look for new droppings, new damage and disturbed repairs. Continued signs mean the problem needs further attention; they do not necessarily prove that the particular opening you repaired has failed.
Your mouse-entry inspection checklist
- Record indoor activity without disturbing contaminated material.
- Inspect every side of the exterior, including closed doors and utility penetrations.
- Check vents and roof edges from safe access.
- Photograph and note each suspected opening.
- Distinguish possible entry gaps from confirmed activity areas.
- Arrange appropriate repairs and address mice already indoors.
- Recheck for fresh activity and get help where inspection remains incomplete.
Sources
- CDC: How to Seal Up to Prevent Rodents
- CDC: How to Clean Up After Rodents
- University of California IPM: House Mouse Quick Tips
- CDC: Controlling Wild Rodent Infestations
- US Department of Energy: Screens and Other Deterrents for Birds, Rodents and Other Pests
- CDC: How to Trap Up to Remove Rodents
- National Park Service: Rodent Exclusion Manual, exterior inspection sections. The dryer-vent advice in this article follows the DOE source above.